
My girls love making sensory bottles, every week they ask if we can make a new bottle. We've recently made a snowflake sensory bottle and spring sensory bottle and they've been begging me to make an Easter sensory bottle. This week we finally got around to making our DIY Easter sensory bottle and I've written up the directions so you can make one too.
This sensory bottle is so easy to make my 4yr old helped out with most of the steps. You can make it alongside your kids, or if you're using it with young children make it yourself and then give it to them to play with. It's a great no mess way to introduce kids to sensory play, a great resource for a calm down corner and a fun Easter sensory play activity.
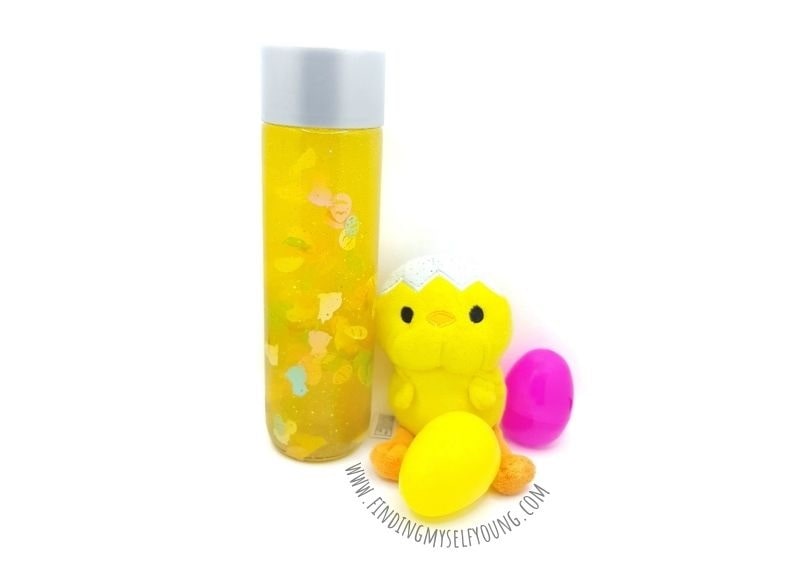
.jpg)
SUPPLIES NEEDED TO MAKE A DIY EASTER SENSORY BOTTLE
- Empty plastic bottle {we used a Voss bottle}
- Elmer's clear glue {147ml bottle}
- Yellow food colouring
- Tempered water
- Easter sequins
- Gold glitter
- Jug
To make your sensory bottle you'll need an empty plastic bottle, you can use any plastic bottle including empty water or softdrink bottles. Our favourite bottles to use are Voss 500ml water bottles because they're a good size, have a big opening and secure really well. You can get Voss plastic bottles in Woolworths in Australia or online at Amazon AU, or from Amazon if you're in the US. There's also many other sensory bottle options online.
To fill the bottle I got some Easter scatter confetti from the dollar shop and some gold and translucent glitter. If you don't want to use loose glitter you can use yellow glitter glue instead of the clear glue, glitter and yellow food colouring.
HOW TO MAKE AN EASTER SENSORY BOTTLE
Before you start assembling your Easter sensory bottle gather all of your supplies together. You'll also want to boil water, then add 350ml to your jug and allow it to cool down until it's warm, but not hot. Once it's warm to touch it's tempered enough to make the sensory bottle {you can make this happen quicker by mixing cold water with boiled water to cool it}.
1. Pour 350ml tempered water into a jug, then add 147ml bottle of clear glue and stir. It's easiest to add the glue with the lid off, especially if the kids are helping with this step.

2. Add a few drops of yellow food colouring to the mixture and stir until combined.
3. Pour the yellow liquid into the sensory bottle. It should fill the bottle to the top, if not add a little more water. If the kids want to help with this step then I suggest using a funnel.

4. Add glitter to the bottle. We used some gold glitter and some translucent glitter. You can skip this step if you prefer not to use glitter.

5. Add Easter sequins to the bottle. You can add as much as you like until you're happy with how they look when shaken.


6. Replace bottle cap and secure the lid. This can be done by adding hot glue to the inside rim of the bottle cap before screwing it on, or by taping up the lid once it's closed. It's important to make sure the lid can't be opened by small children.
7. Shake your bottle! Watch how the glitter and sequins dance around in the liquid as they fall to the bottom of the bottle.


The girls love our Easter sensory bottle so much they already want to make more bottles. You can see it in action in the video below. You could also use this sensory bottle as a discovery bottle asking children what items they can see and how many colours of those items they can count e.g. 5 pink eggs.

MORE SENSORY BOTTLE IDEAS
Disclosure - This post contains some affiliate links, which means I may make a small commission at no cost to you, should you make a purchase.


Why do you add glue to the water?
ReplyDeleteIt makes the sequins and glitter float down slower through the water.
Delete