
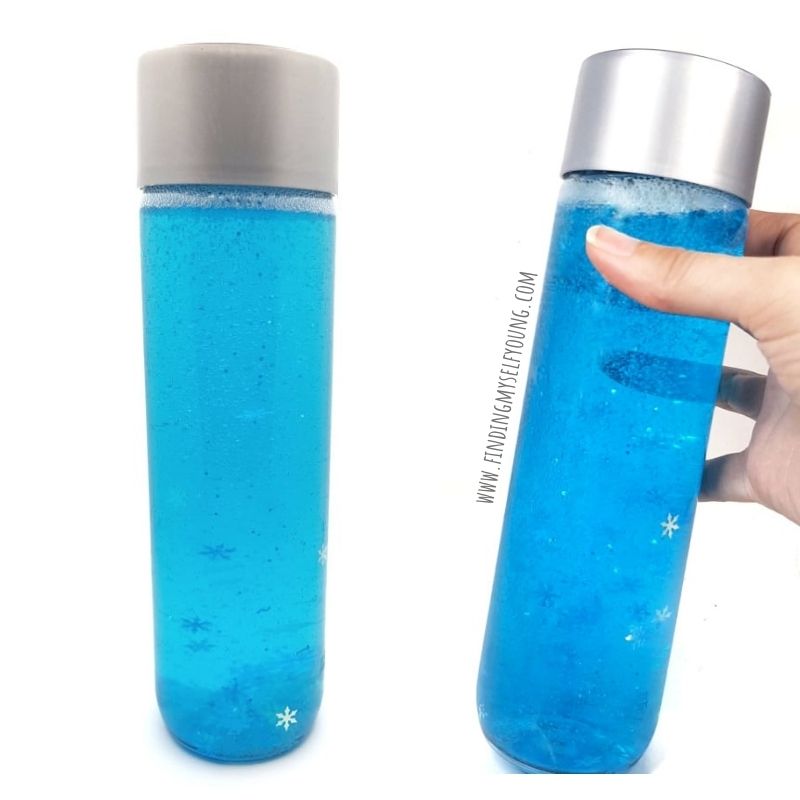
We're a little bit obsessed with sensory bottles in this house and we're slowly making them for each and every possible theme. Our latest one is a winter snowflake sensory bottle that was inspired by Frozen. It's perfect for little Frozen fans and sensory seeking kids {and adults}.
Sensory bottles are a great tool to help children learn how to self regulate and calm down. It's mesmerising watching the contents disperse and slowly fall back to the bottom. They're also super easy to make at home with just a few items. My 4yr old actually made our winter sensory bottle and only needed help with a few steps.
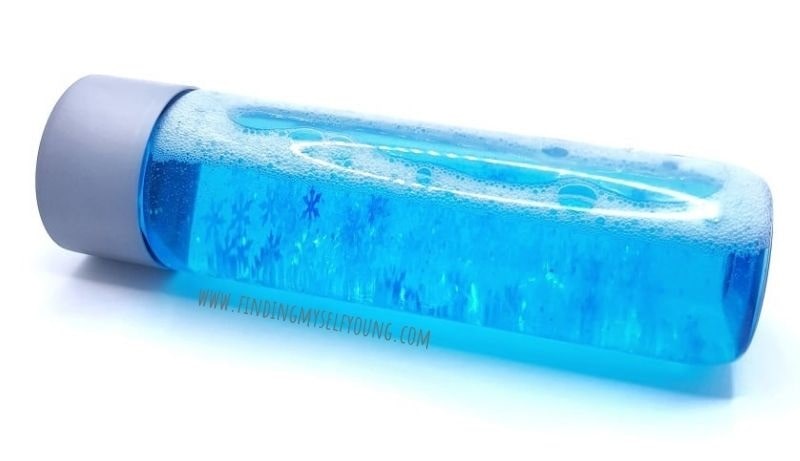
This Frozen inspired sensory bottle is great to add to a calm down corner, or to use in some Frozen inspired play. The girls love shaking it to create snow storms all the time. It's like an oversized snow globe and shaking it is pretty addictive, even for me!
My youngest daughter is obsessed with Frozen and anything snow {or ice} related is automatically a huge hit with her thanks to Elsa and Anna. So naturally this sensory bottle is her favourite one we've ever made and she's convinced it belongs to Elsa.
Where we live we don't get snow so my kids have never seen it for real, so this snowflake sensory bottle is a novel way for them to see snowflakes falling and imagine what it feels like to live somewhere cold.
It's also a great resource to have on hand when learning about seasons, which my oldest has recently started learning at school. We've made a whole set of season sensory bottles for summer, autumn, winter and spring.
If you're after more snowflake activities you can also try snowflake threading, popsicle stick snowflakes and these snowflake science ideas.
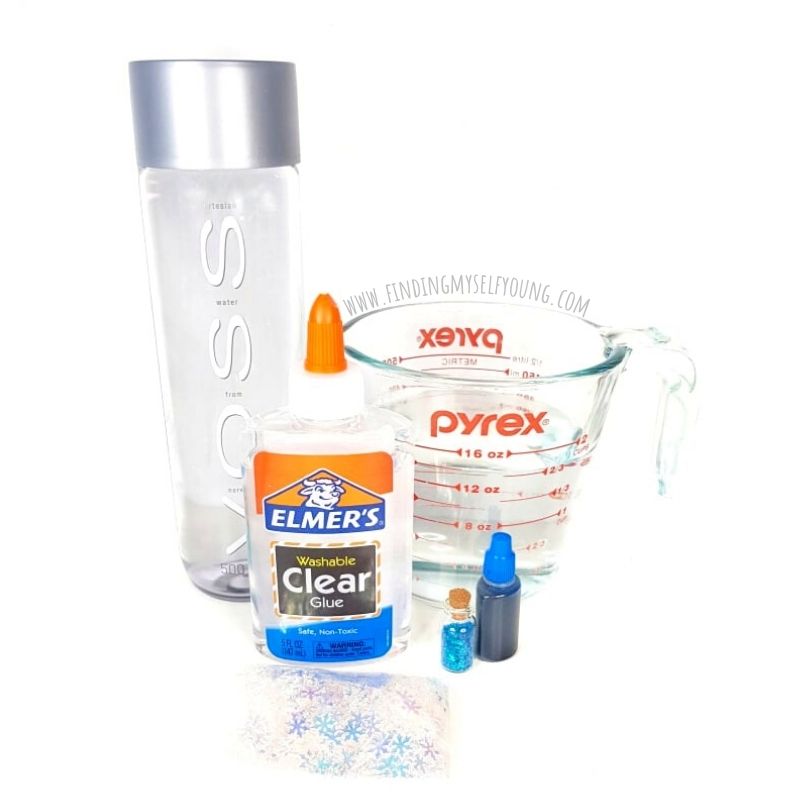
- Voss water bottle
- Elmers clear glue {147ml/5oz}
- Snowflake sequin confetti
- Blue food colouring
- Blue glitter
- 350ml Water
- Jug
I always use Voss 500ml plastic water bottles for our sensory bottles because they're a good size and the plastic makes them safer for kids. You can get the Voss bottles from Amazon, Amazon AU or in Woolworths if you're in Australia. If you can't find the plastic Voss bottles don't worry because you can get other plastic sensory bottles online, or you can use empty water or soft drink bottles. It would also work in the Jellystone calm down bottles.
I got snowflake sequins from Aliexpress, but you can also get them online at Amazon, or close to Christmas time at craft and dollar stores. There's also plenty of different sizes of snowflake sequins and any size will work in the sensory bottle as long as they fit through the opening. We got holographic snowflakes so they can reflect white or blue under different lighting.
HOW TO MAKE A WINTER SNOWFLAKE SENSORY BOTTLE
Before you start assembling your snowflake sensory bottle gather all of your supplies together. You'll also want to boil water, then add 350ml to a jug and allow it to cool down until it's warm, but not hot. Once it's warm to touch it's tempered enough to make the sensory bottle {you can make this happen quicker by mixing cold water with boiled water to cool it}.
1. Pour tempered water into a jug, then add 147ml bottle of clear glue and stir. It's easiest to add the glue with the lid off.
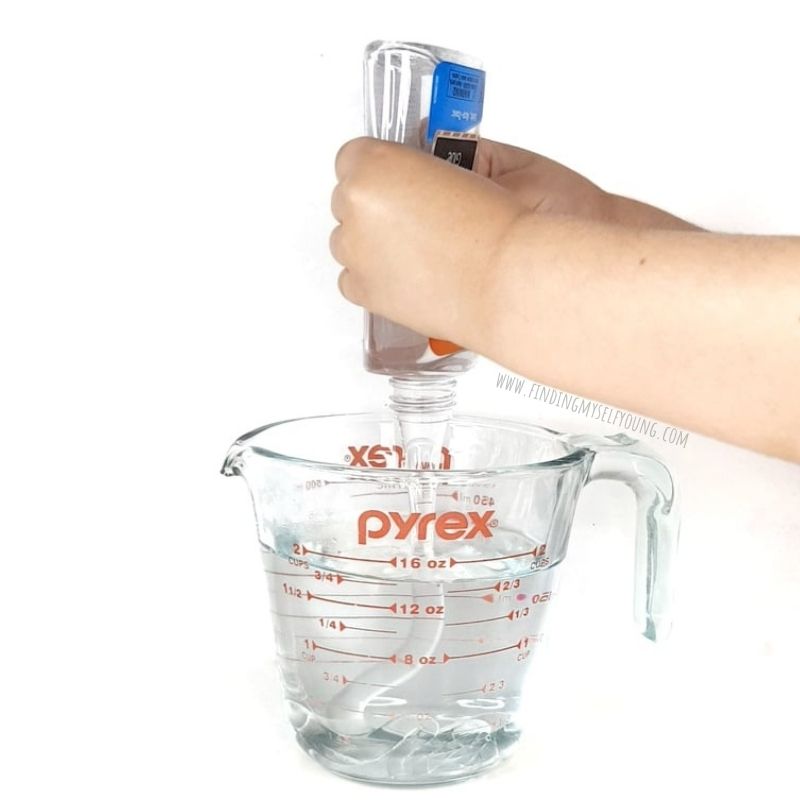
2. Add a few drops of blue food colouring to the mixture and stir until combined.

3. Pour blue liquid into the sensory bottle. It should fill the bottle to the top, if not add a little more water.
4. Add snowflake sequins to the bottle. Add as many as you like.

5. Add glitter to the bottle. You can add as much glitter as you like until you're happy with the saturation. Just remember the more glitter added the harder it will be to see the snowflakes.
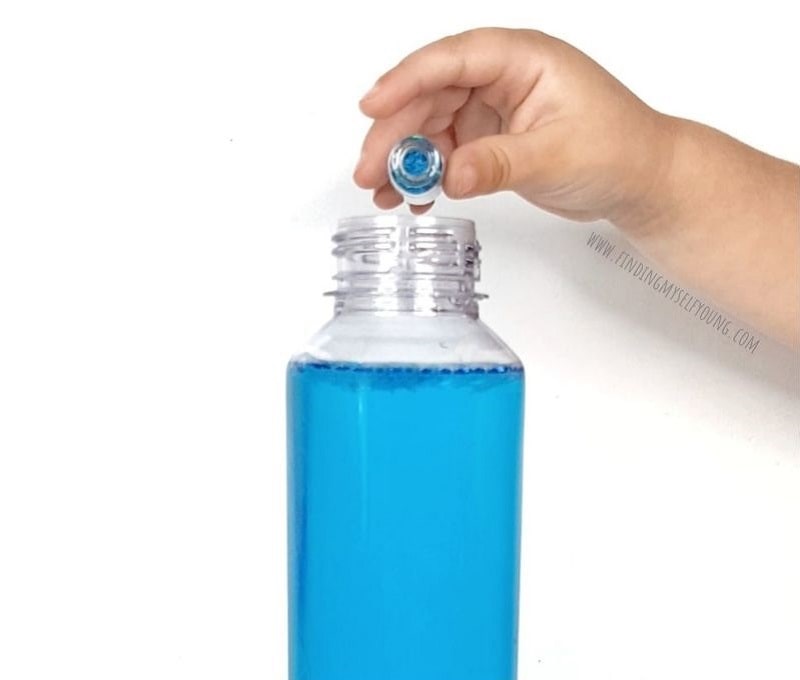
6. Replace bottle cap and secure the lid. This can be done by adding hot glue to the inside rim of the bottle cap before screwing it on, or by taping up the lid once it's closed. It's important to make sure the lid can't be opened by small children.
If you don't want to use loose glitter in your sensory bottle you can substitute the glitter, food colouring and clear glue and use Elmer's blue glitter glue instead. You can also adjust the speed at which the snowflakes fall to the bottom of the bottle by changing the water/glue ratio - add more glue to make it move slower, or less glue if you want it to fall really quickly.
My 4yr old loved being able to make some of our sensory bottle herself {under my supervision}, making it was just as fun for her as playing with it. Putting the sequins and glitter into the bottle was also great fine motor practice.

MORE SENSORY BOTTLE IDEAS
Disclosure - This post contains some affiliate links for your convenience, which means I may earn a small commission at no cost to you, should you make a purchase.


