
Do you use kitchen items for play or craft? We love it! I'm totally that weird mum scouring the kitchen aisles at stores for items that will never actually be used in my kitchen. Apart from our beloved cutlery tray, our second favourite kitchen item to use is a salad spinner.
We only own one salad spinner and I've never spun a salad in it. In fact I only bought it to use it for art. Fun process art activities to be exact, just like these salad spinner Easter eggs.

WHAT IS SPIN ART?
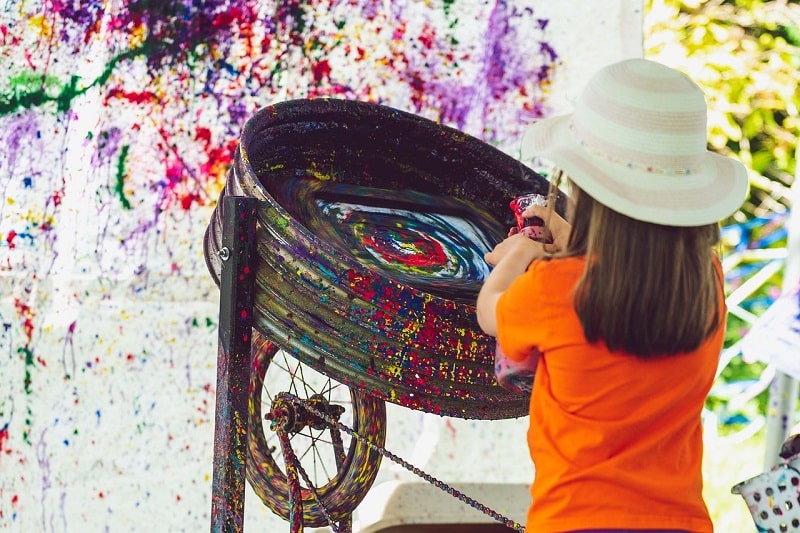
Spin art is a process of creating art by dripping paint onto a rapidly spinning secured canvas. As the canvas is rotating rapidly, the force created pushes the paint outwards from the centre. The process results in beautiful unique abstract splatter paintings, generally with a circular pattern.
Spin art can be created using many different circular spinning items such as mechanical turntables, washing machine drums, bike wheels, a lazy susan, a canvas secured to a drill, a salad spinner or kids spin art kits.
 |
| Image: Vladvictoria via Pixabay |
Our favourite way to create spin art is with a salad spinner. The process of spin art can be quite messy with paint splattering at high speed, however a salad spinner is the perfect way to contain all of the mess, but still allow for fast circular movement. The salad spinner acts as a small centrifuge able to spin quite rapidly {with little manual effort} and the outer bowl stops the paint from flying out everywhere.
To make spin art Easter eggs you will need
- A salad spinner
- Washable paints
- Plastic, foam or wooden eggs
- Parchment paper
- Tray
We bought our salad spinner from Ikea for only a few dollars, however you can also get them at department stores, dollar shops and kitchen stores. Make sure that you're only using washable paint inside the salad spinner so it will be easy to clean out after and won't get permanently stained. I also suggest using paint that comes with a squeeze lid, or decanting it into a squeeze bottle, as it will make dripping the paint into the salad spinner much easier - especially for little hands.
You'll need matte plastic, styrofoam, or unfinished wooden eggs. We used white matte plastic eggs from Riot {you can get similar ones from Amazon here}. The spin art paint designs will show better on white eggs rather than brown eggs.
This process will not work with real eggs, even if they've been hard boiled, as the shells are too delicate and will likely crack when spinning around. Using fake eggs not only gives an amazing paint finish, it also means they can be kept and reused every year.
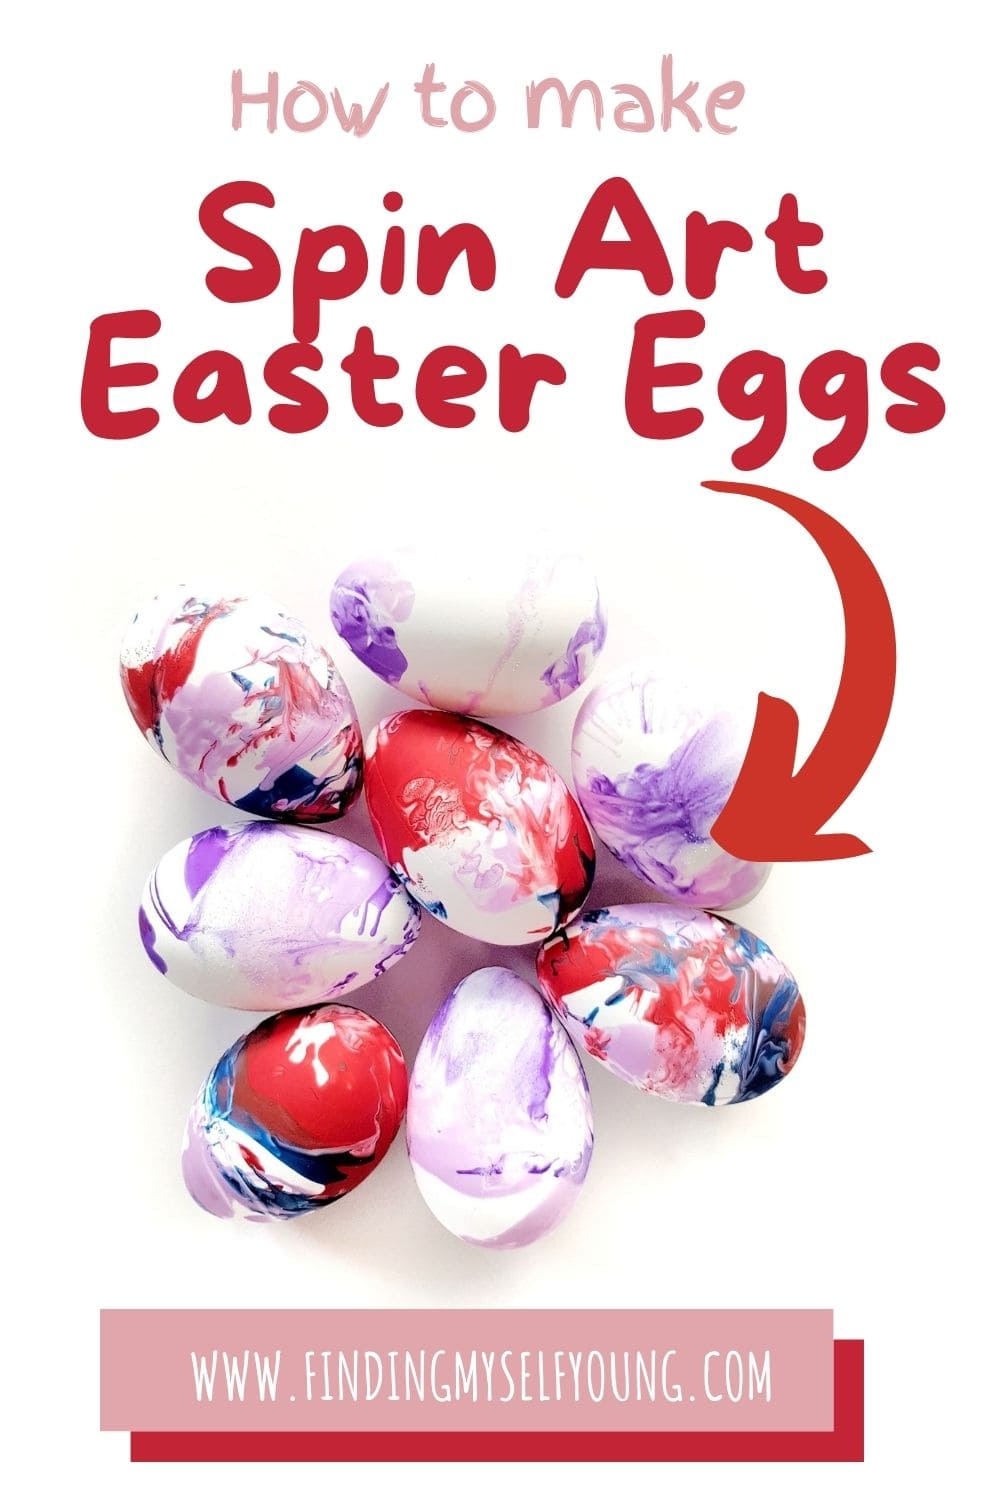
HOW TO CREATE SPIN ART EASTER EGGS
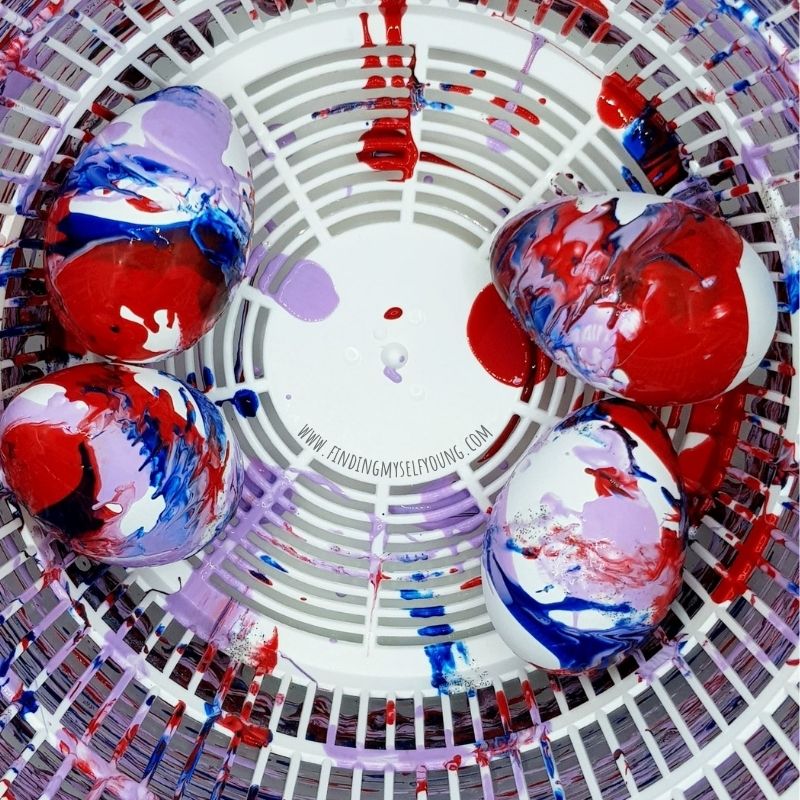
1. Place desired number of eggs into the salad spinner. We did 4 at a time so they would all get even coverage.
2. Squirt a few generous drops of paint onto each egg. Repeat for each colour you want to use. We used red, blue, pink and some silver glitter paint.

3. Secure the salad spinner lid and spin for 20-30 seconds. Remove the lid to inspect the eggs, they should be covered with streaky marbled patterns from the paint. If the eggs aren't coloured enough after one spin then add a few more drops of paint and spin again.
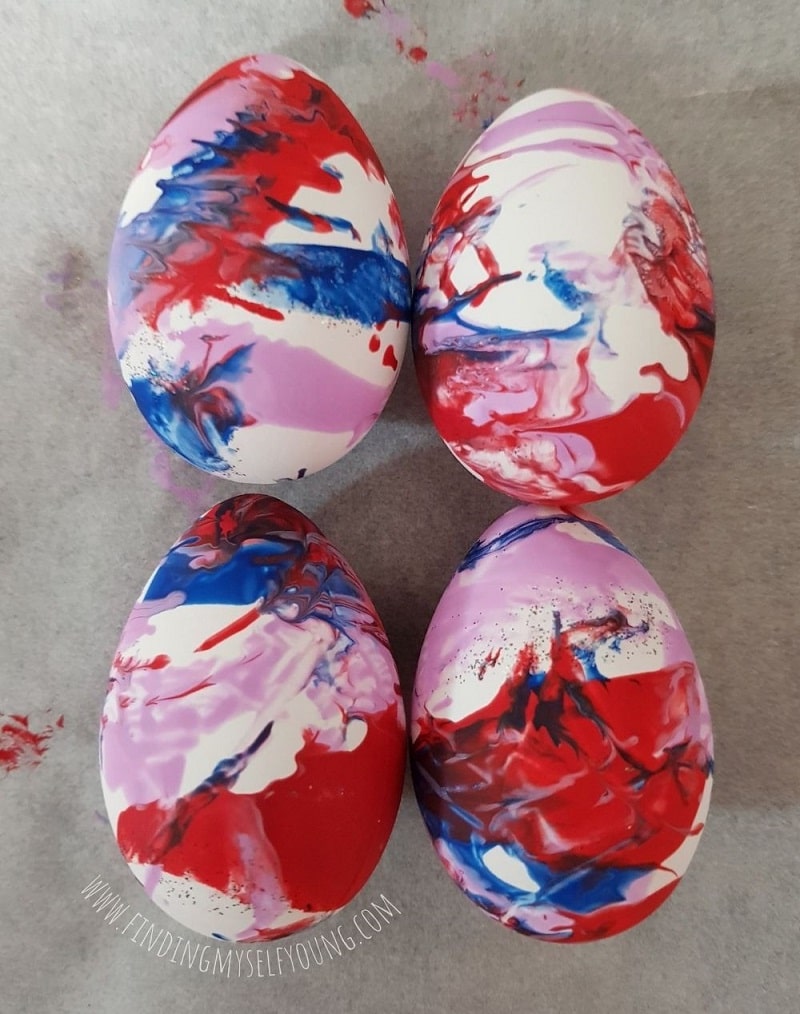
4. Remove eggs from the salad spinner and leave to dry on parchment paper on a tray. Our eggs took approximately 2hrs to be completely dry.

5. Rinse the salad spinner in soapy water to remove paint. If you want to do more eggs in different colours repeat steps 1-4 after cleaning paint off the salad spinner. After we did our first lot of eggs we did another 4 with purple, pink and glitter paint.
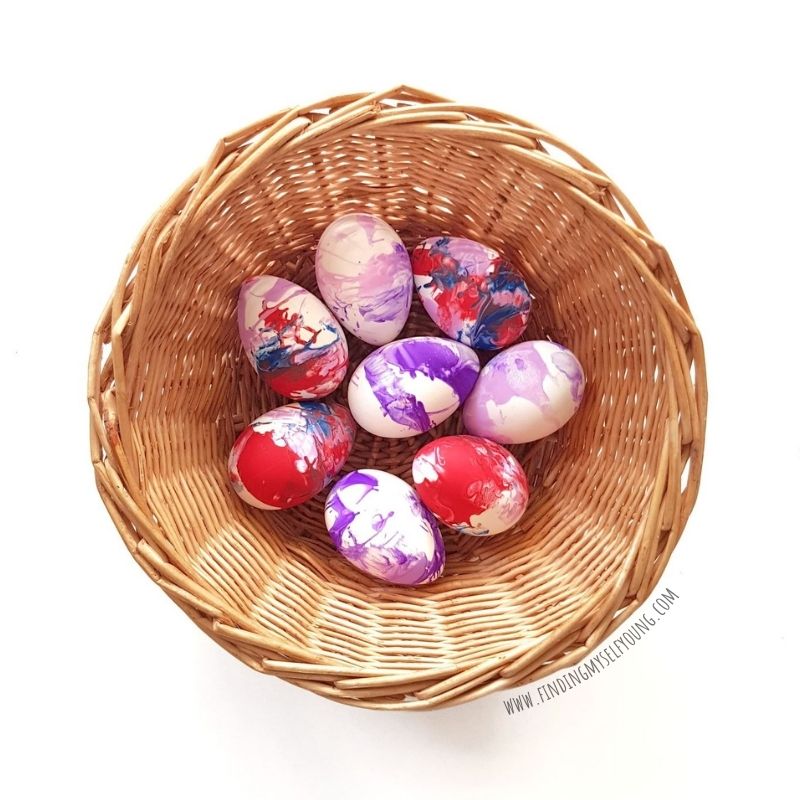
6. Once eggs are dry display them in a basket or egg carton for Easter. They can also be used in Easter sensory bins. If you used plastic or foam eggs then they can also be hot glued onto an Easter bonnet.
The girls loved that making the eggs was such an interactive process and that they could do all the steps. Making the eggs was just as exciting as seeing the finished product. What's great about spin art is that each egg will have it's own individual pattern even though you're using the same paint on all of the eggs.
Ours eggs came out with a mixture of colour bleeding, splatter and streak effects which gave a really nice overall marbled look. They remind me of resin poured art.

The eggs will be shiny while the paint is still wet and then turn matte once the paint is completely dry. If you want your eggs to have a shiny appearance, once they are completely dry add a few coats of clear varnish {allowing each coat to completely dry} to seal the paint and add a sheen.
The girls loved creating our spin art eggs so much that I'm going to get some more eggs so we can experiment with different colours. We're also going to dye eggs using some of these techniques as well.
Disclosure - This post contains some affiliate links for your convenience, which means I may make a small commission at no cost to you, should you make a purchase.


